
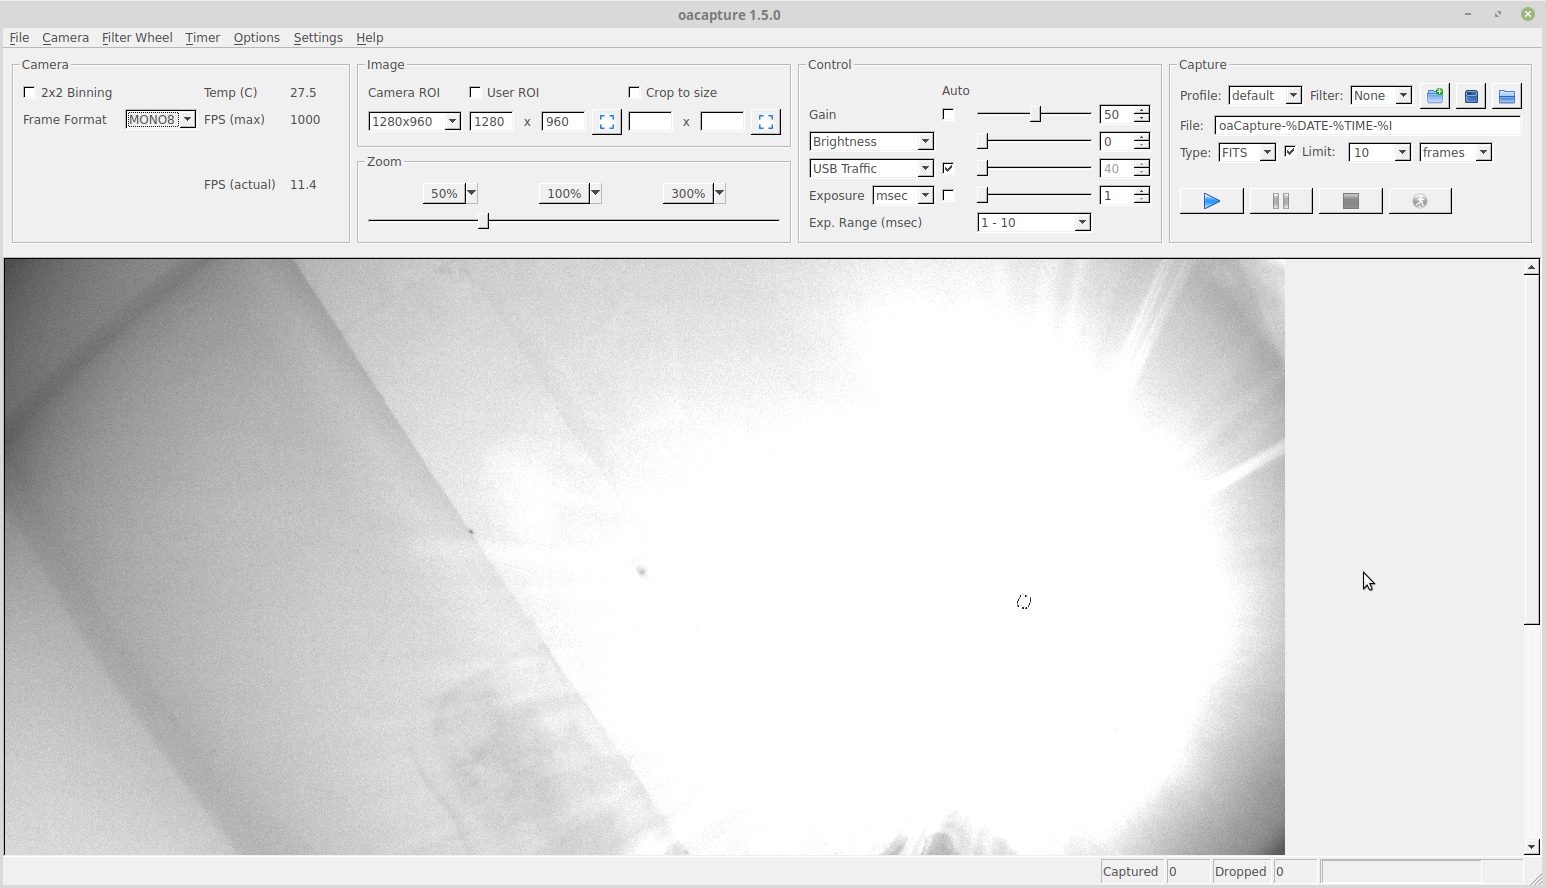
After starting oacapture you should see a screen like this:
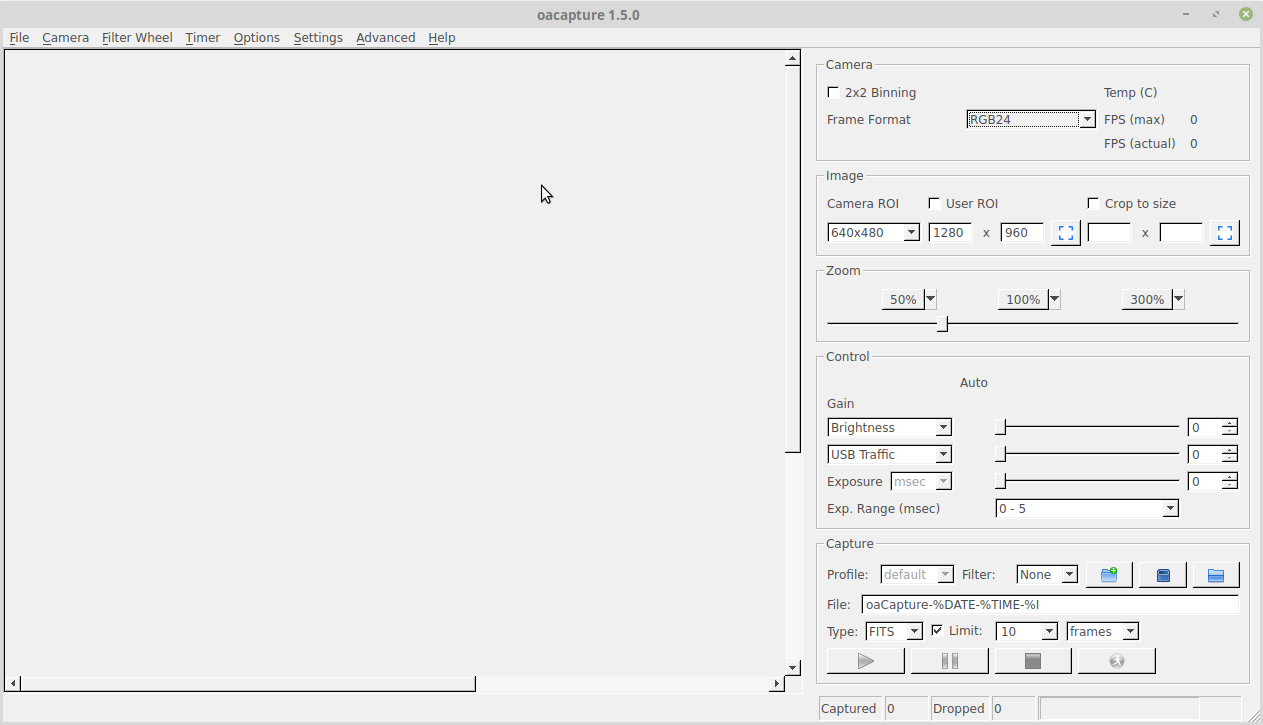
The main controls are on the right and there’s a status bar at the bottom with a scrolling area for previewing the image from the camera in between.
Program control and configuration
Menus for controlling and configuring the application itself appear at the top. First is the “File” menu:
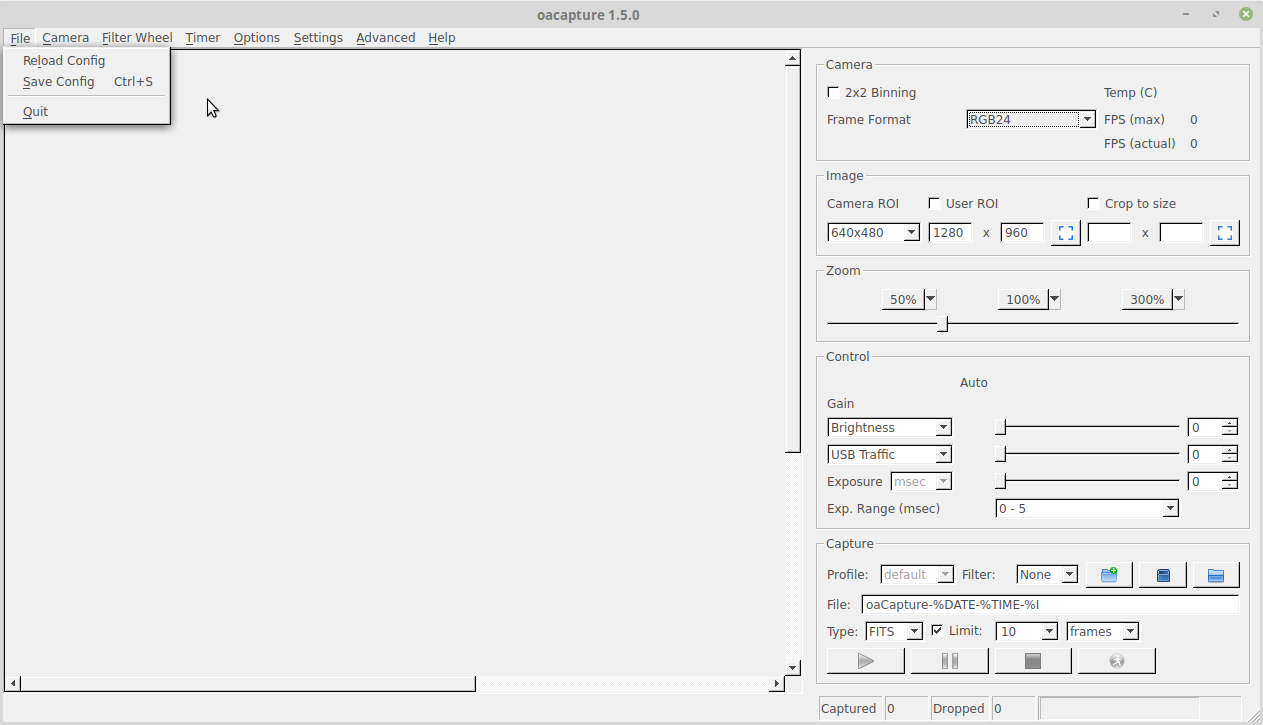
At the moment the “Save” and “Reload” configuration options do nothing, so “Quit” is the only useful choice here. The current configuration is saved when the program exits unless configured otherwise.
Next is the “Camera” menu:
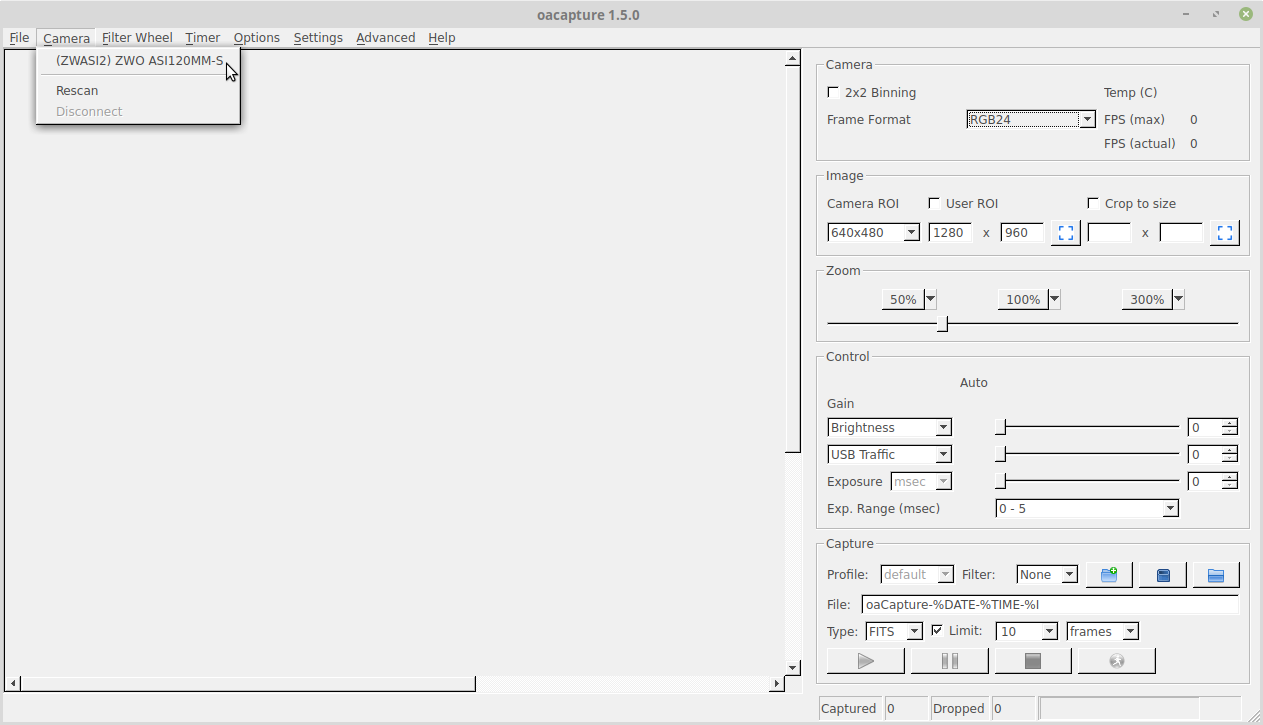
This shows any currently recognised cameras and the interface used to connect to them. “Disconnect” disconnects the camera and “Rescan” rescans to update the camera choices after cameras have been added or removed, so it is possible to connect a camera and use it after the application has started.
In this case a ZWO ASI120MM-S has been found using the ZWO ASI v2 interface.
The next menu is for filter wheels. This works similarly to the previous camera menu:

Here there’s a Xagyl five-slot 1.25″ wheel attached.
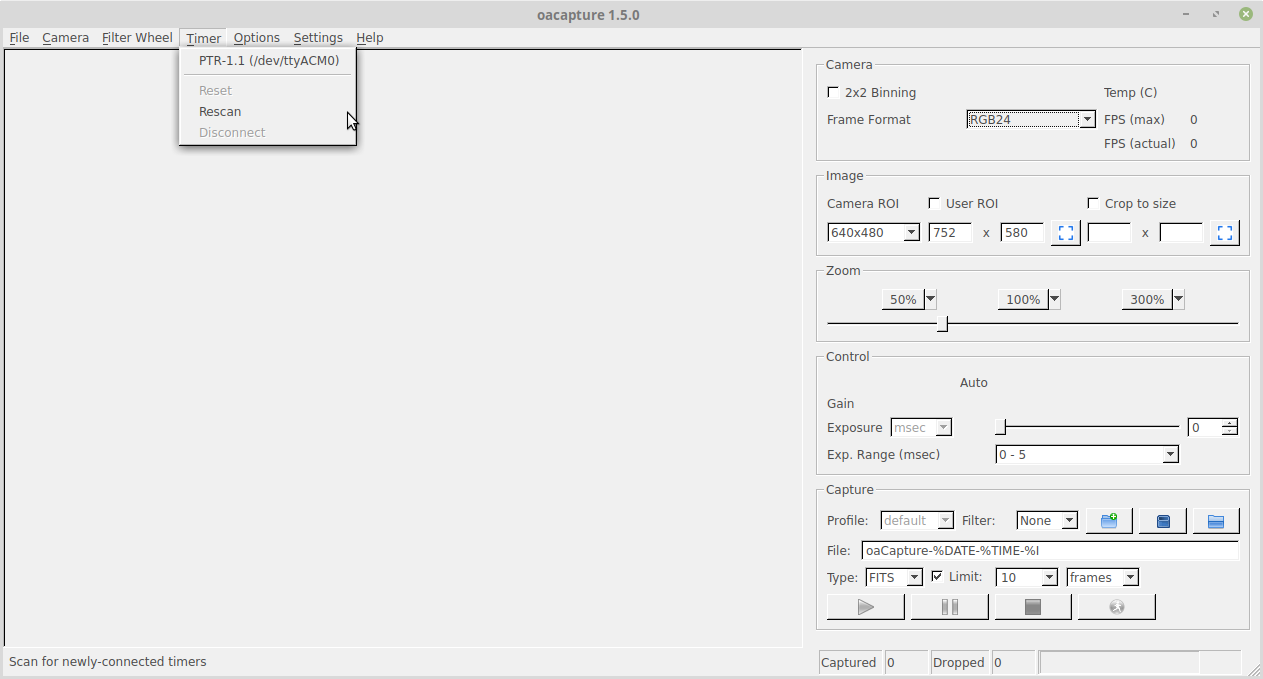
The next menu option, “Timer”, relates to occultation timing hardware. This can be ignored for the moment.
The “Options” menu enables various components of the application:
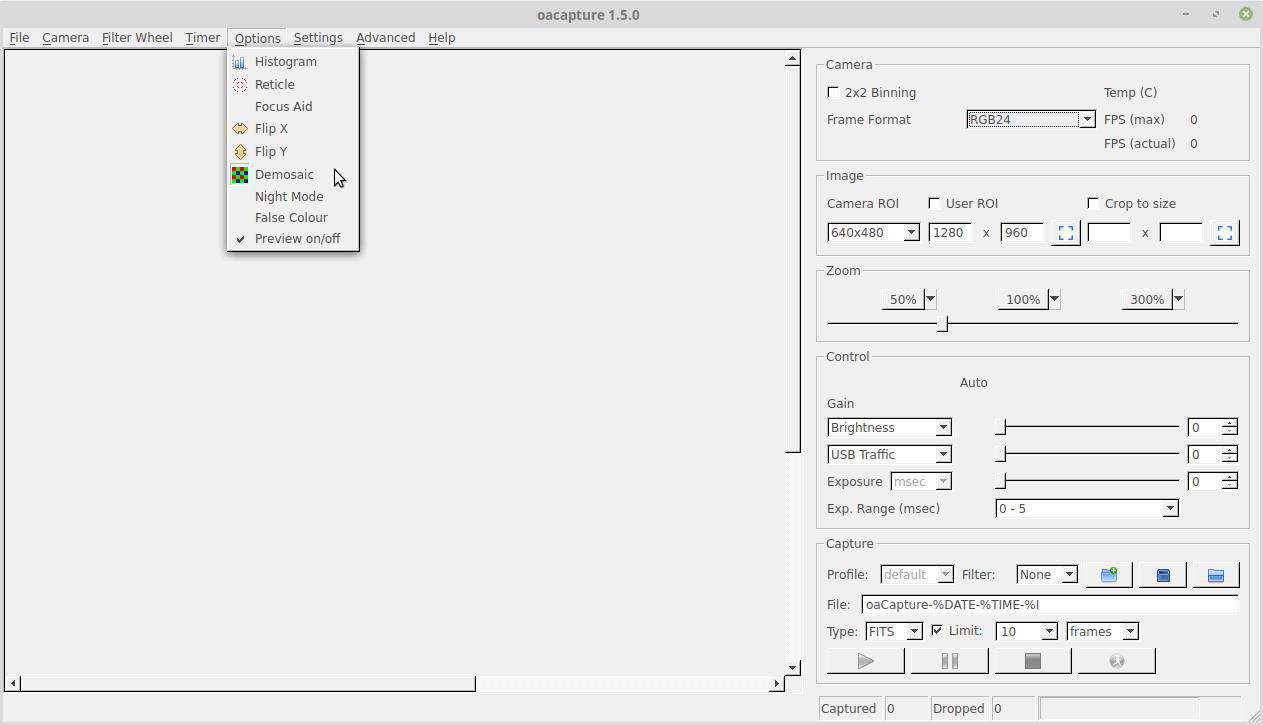
“Histogram” opens a new window to display a histogram for the captured data.
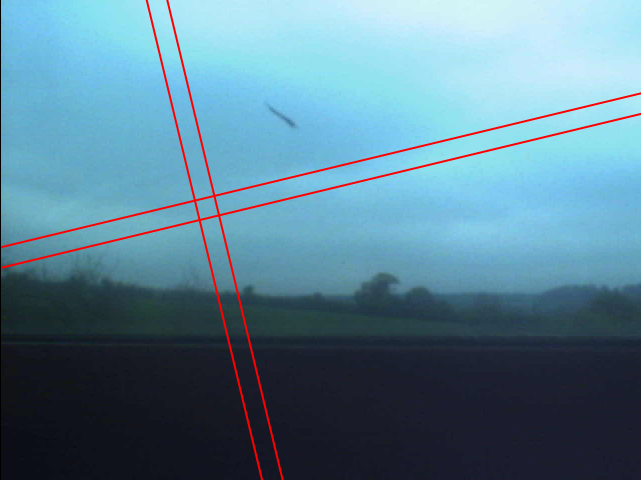
“Reticle” displays a reticle over the captured image in the preview window. A number of different reticle types are available, chosen from the “Settings” dialog (see later). Once displayed the centre of the reticle can be dragged around the screen by “grabbing” the centre with the mouse, or rotated using a mouse scroll wheel when the pointer is in the preview area:
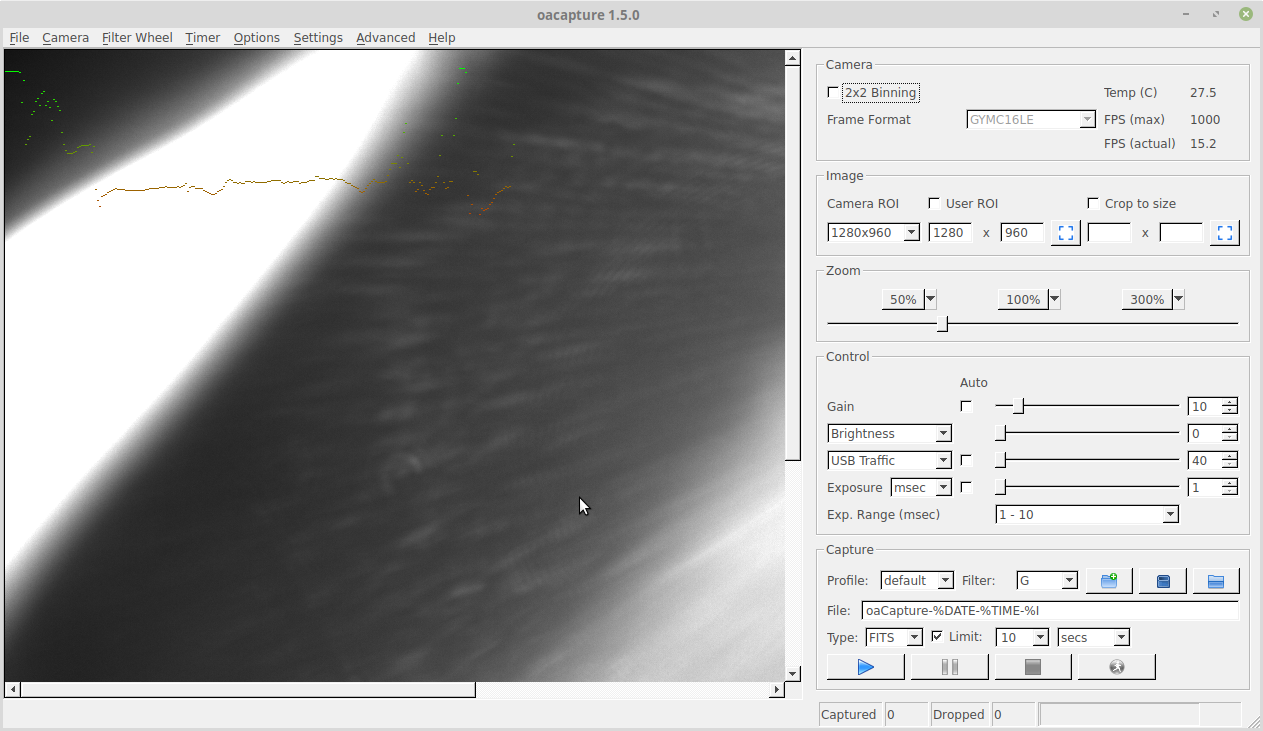
The Focus aid attempts to give an indication of how well the image is focused, showing a graph over the image varying from red to green, where red is not so well focused and green is better focused. Unfortunately it’s not too clear in this example because the image is so bright.
“Flip X” and “Flip Y” flip the image about the vertical and horizontal axes respectively. If the camera supports this in hardware then the flipping will be done that way, otherwise in software. Flipping raw colour images may result in unexpected behaviour as the original colour mask may no longer be suitable.
“Demosiac” enables conversion of raw colour data from monochrome to full colour. This can be just for the preview image or for both the preview image and the frame written to an output file. If your camera is producing raw colour data you may need to configure this in the demosaic settings and then enable this to get full colour.
“Night Mode” turns the application red.
“False colour” colourises a mono frame image based on the settings from the false colour settings menu.
“Preview on/off” turns the preview image on and off.
The “Settings” menu controls configuration of the application behaviour:
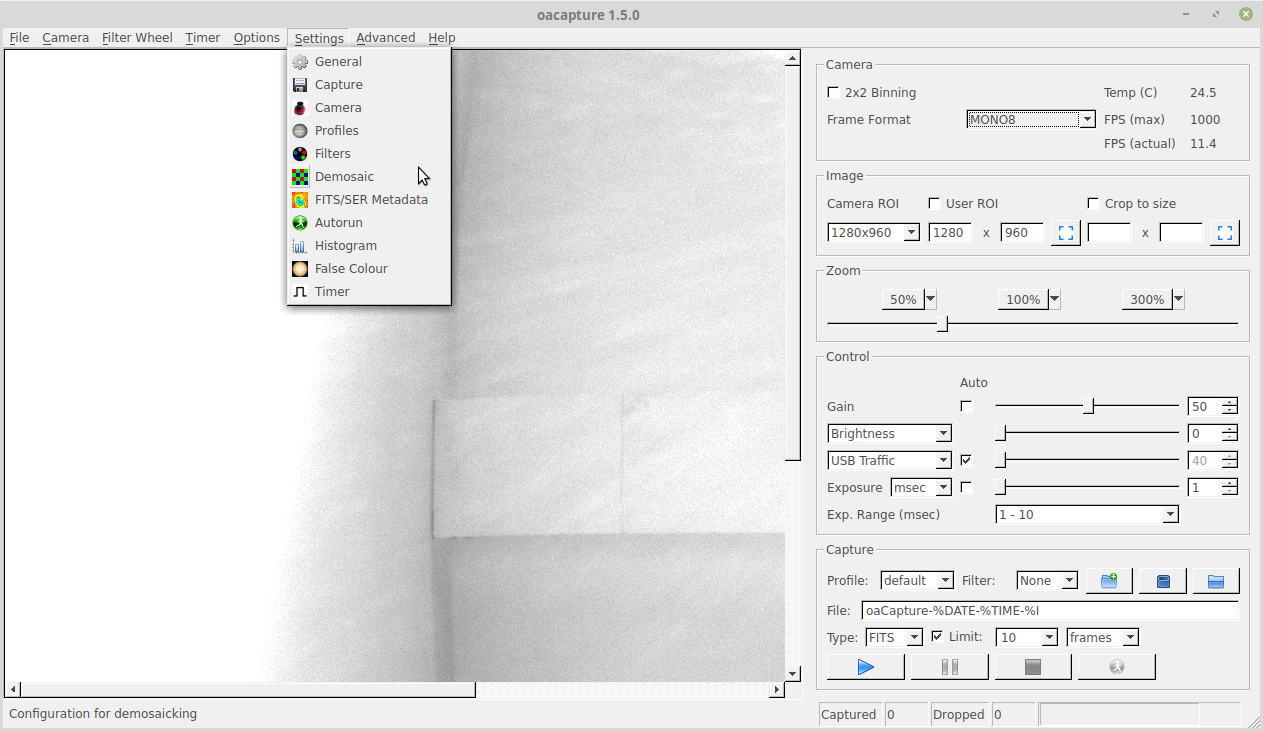
All these options open the same configuration window at a different tab.
General
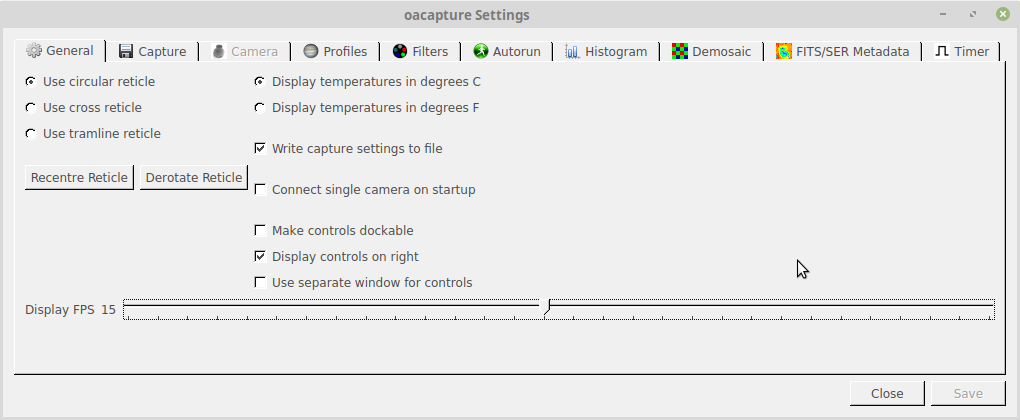
Hopefully the reticle and temperature settings should be mostly self-explanatory, but the “Recentre reticle” and “Derotate reticle” buttons restore the original orientation of the reticle should you need to.
“Write capture settings to file” enables writing a file of the same name as the file of captured data, but with a “.txt” extension. This contains the camera settings used when the data was captured.
“Connect single camera on start-up” allows oacapture to automatically connect to a camera when the application starts, if it only finds one camera present.
“Make controls dockable” allows the control panels in the main window to be detached from the application and moved elsewhere on the screen. This may help with small displays where there’s not much space left outside the camera image itself.
“Display controls on right” is now the default. Unchecking it moves all the control panels from the right of the image preview to above it, giving a layout like this:
Finally another option that may help on small displays, to split the controls off into a separate window that can be hidden behind the main preview window or minimised to get it out of the way.
These three options require the application to be restarted.
“Display FPS” allows the frame rate to be set for the preview window.
Capture
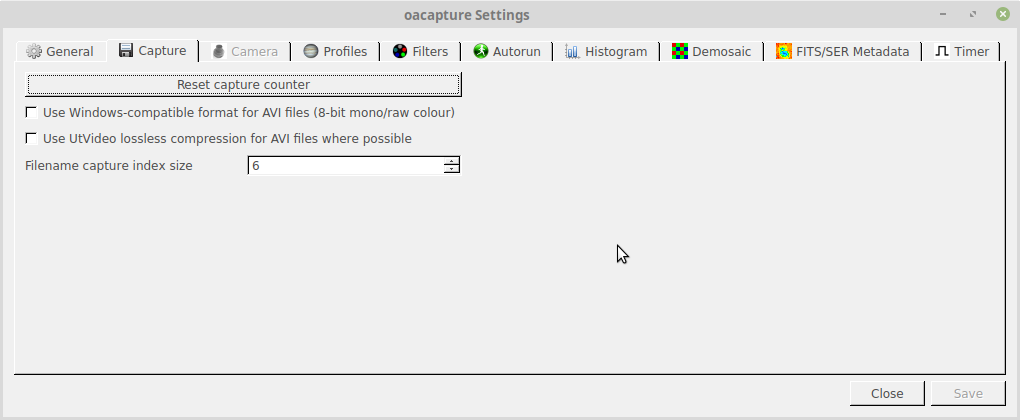
The “reset counter” button here resets the counter used when saving images where a new file is used for each frame, for example FITS, TIFF and PNG.
The Windows-compatible AVI file format is required to replay files on Windows and probably should also be set when saving AVI files on MacOS.
The UtVideo codec can be selected for AVI files for some frame formats if required. The default codec for AVI files is “raw”.
Finally the capture index size is the number of digits in the index field when it is inserted into the saved filename (see the capture controls for more information).
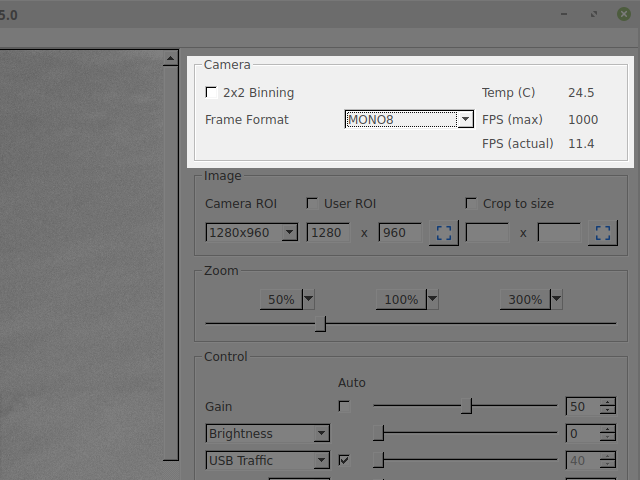
Camera
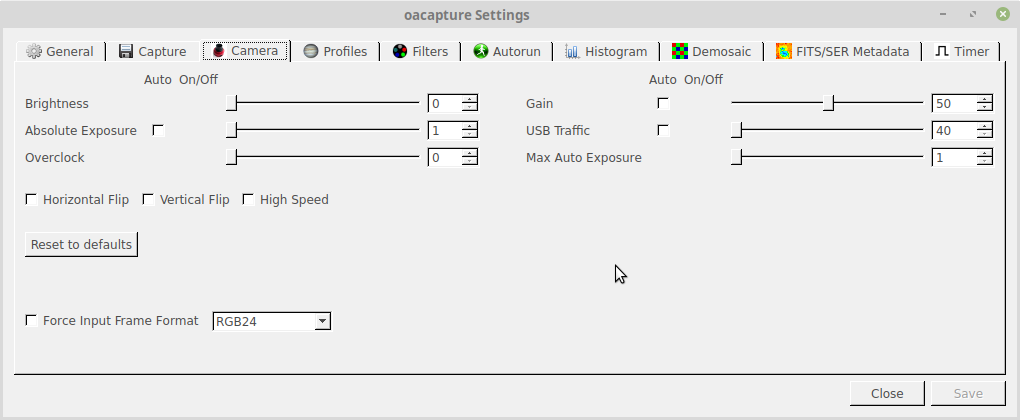
This section allows access to (nearly) all of the available camera controls in a single place. There are a few that aren’t supported such as switching between colour and raw mode. Where this is the case a list of the unsupported controls should appear at the bottom of the window. The example above is from the ASI120MM-S.
“Force Input Frame Format” allows the user to override the frame format reported by the camera. For example, colour SX Lodestar cameras still claim to be monochrome, so they can be set to the real frame format here. In general however, there’s an easier way to do this on the “demosaic” page when the camera reports a monochrome frame for what is actually raw colour.
Profiles
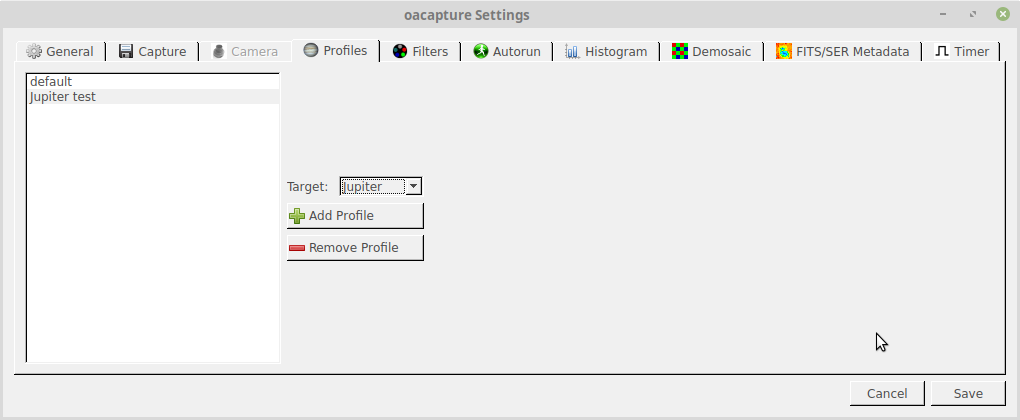
Adding a profile saves the current camera settings for later use. A meaningful name for the saved settings can be entered in the left-hand panel. These are then available to chose from the “Profile” menu in the capture settings panel.
There’s a list of targets that might be associated with any given profile in the drop-down. This isn’t used as yet, but will be used in the future to calculate ephemeris data and provide other useful information from that.
Filters
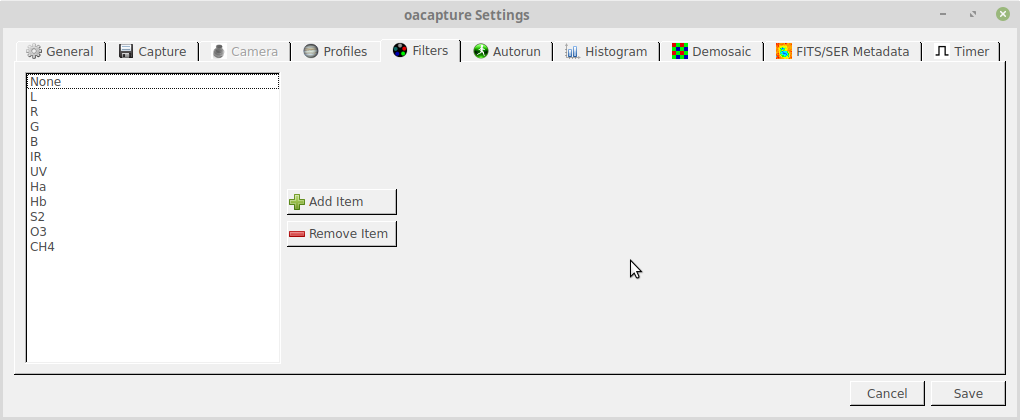
Sets the names of the filters that can be selected in the “Filter” menu in the capture panel.
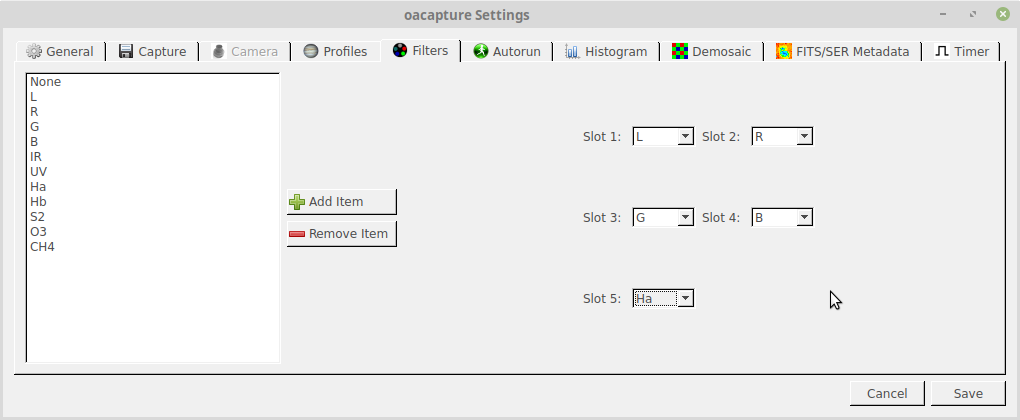
When a filter wheel is connected further options will be shown to select the filter in each slot in the wheel:
Autorun
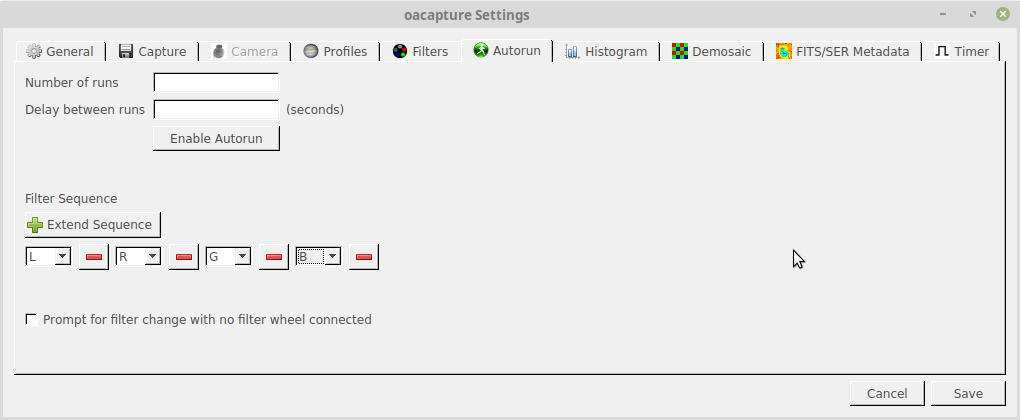
Autorun enables a sequence of capture runs to be completed one after the other. The number of runs and the delay between them can be configured, then click “Enable Autorun” to set oacapture start next time the capture button is clicked in the capture pane.
A sequence of filters may be configured for each autorun pass. This doesn’t require an electronic filter wheel to be connected to work. In the case where there is no wheel connected, the checkbox pops up a prompt window to allow you to move to the next filter before continuing with the capture.
Histogram
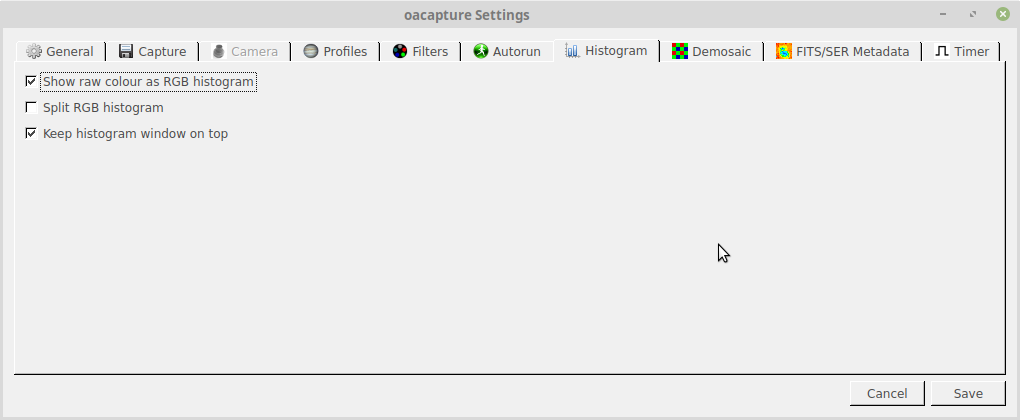
The first option allows the histogram to be generated for raw colour images as well as RGB.
When the image is RGB, the histogram can be displayed either as one histogram with the three colour graphs laid on top of each other, or as three separate graphs.
Normally the histogram will stay on top of all other windows, but the third option here allows that behaviour to be turned off.
Demosaic

The first two options here set the handling of raw colour data when the “Demosiac” selection is made from the “Options” menu. Either just the preview window can be converted to RGB, in which case data written to files will remain in raw form, or both can be converted to RGB, or just the data written out. The last choice is probably not very useful.
The second set of options used allow the algorithm for the raw to RGB conversion to be selected. “Nearest neighbour” is fast but low quality. Bilinear is slightly slower, but does a far better job and should be preferred. Smooth Hue and VNG (Variable Number of Gradients) may well be too computationally intensive for many machines.
The group of options on the right select the CFA pattern to use. If you’re not sure it may be helpful to set up during the day and change options until the colours look correct. It is usually fairly obvious when they aren’t. Note that at one time the software TIS provided with their cameras cropped off the first line of the image so the pattern they document may not be the correct one to use here. GBRG is the correct pattern for the TIS cameras that I have tested.
If “auto” is selected then oacapture will use whatever the camera driver claims is the actual format.
Finally, the “Treat mono frame as raw colour” option forces frames returned by a colour camera with raw frames that it claims are mono to be interpreted as the correct colour format as selected from the Bayer options above. Obviously “Auto” won’t work in this case.
FITS/SER Metadata
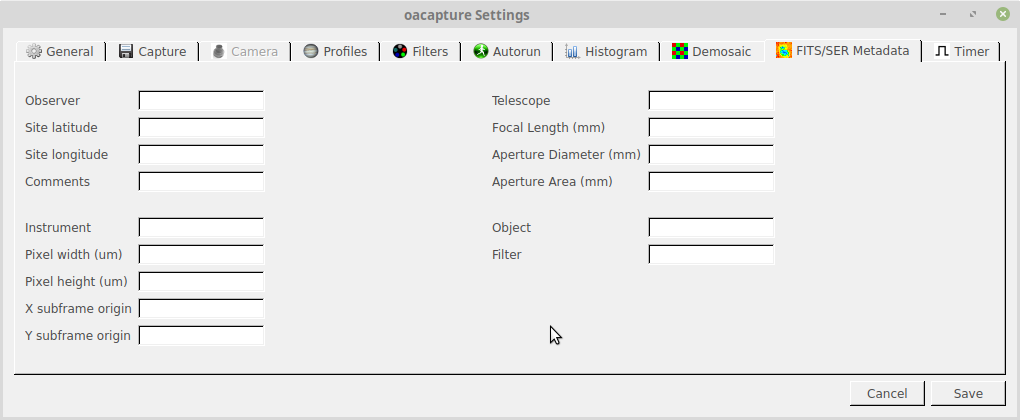
These fields may be set so they’re added to FITS and SER files (and as PNG comment fields). If the data can be obtained from other sources then by default it will be used to populate these fields. The entries here will override all other sources.
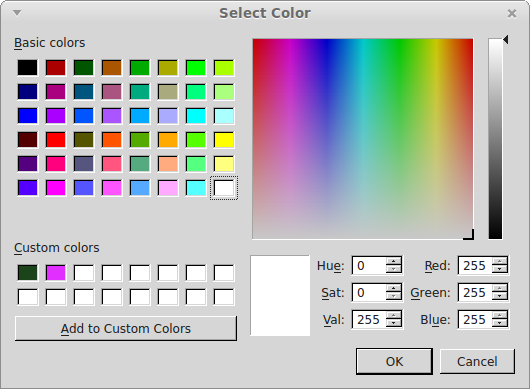
False Colour
The “False colour” settings menu option opens a colour selector to choose the colour for the false colour mask that can be applied to mono images:
Timer

This relates to an occultation timing device and can be ignored for the moment.
Finally on the main toolbar options is the “Advanced” menu for configuration that most of the time no-one will want to play with. In this case it’s just some configuration stuff for Xagyl filter wheels and the previously-mentioned timing unit:
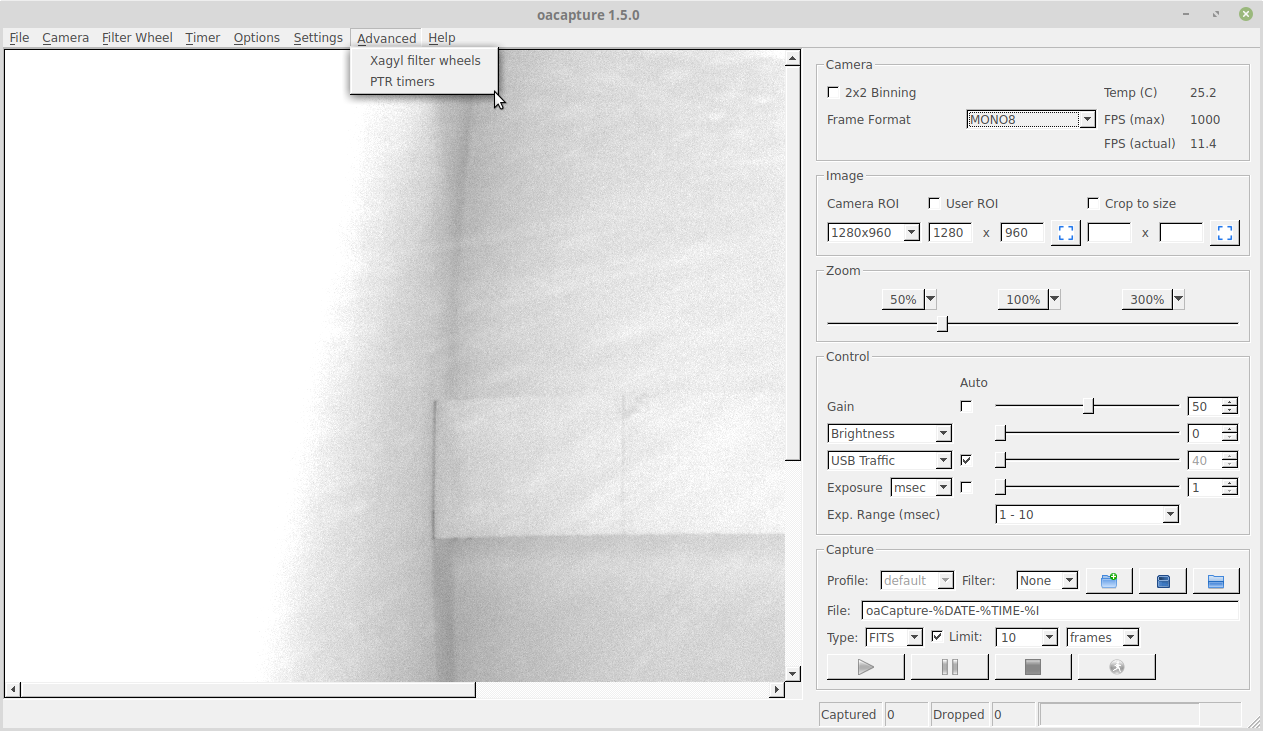
The Xagyl filter wheels option opens a dialog box allowing the user to configure how a Xagyl filter wheel can be identified as the USB VID and PID and the USB Manufacturer, Product and Serial Number strings vary between models in undefined ways. These strings must be a perfect match, so it’s necessary to know exactly what they are. On Linux they can be found from the system logs after the wheel has been plugged in. There should be entries something like this:
[50619.465514] usb 3-1.1.1: New USB device found, idVendor=0403, idProduct=6015

[50619.465519] usb 3-1.1.1: New USB device strings: Mfr=1, Product=2, SerialNumber=3

[50619.465522] usb 3-1.1.1: Product: FT230X Basic UART

[50619.465524] usb 3-1.1.1: Manufacturer: FTDI

[50619.465527] usb 3-1.1.1: SerialNumber: DA001CEZ
Controlling the camera and capture
Camera Settings
The Camera pane allows the binning and frame formats (where a camera supports more than one) to be chosen. Where the camera supports it, the temperature is also displayed. The maximum FPS figure is based on exposure time, and actual FPS should be obvious.
A list of all frame formats supported by the camera should be selectable from the drop-down menu:
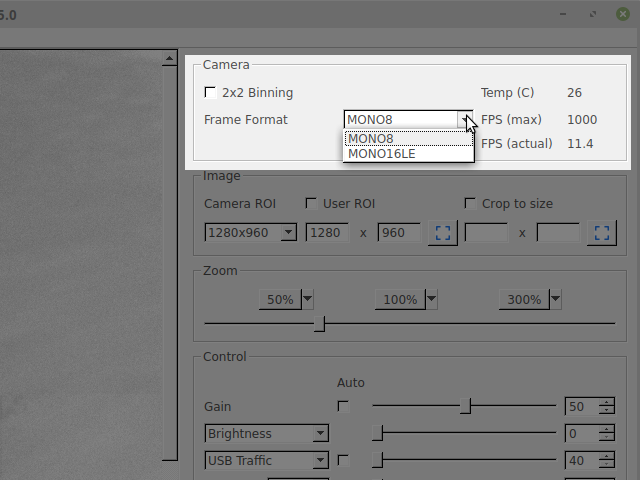
Image Size
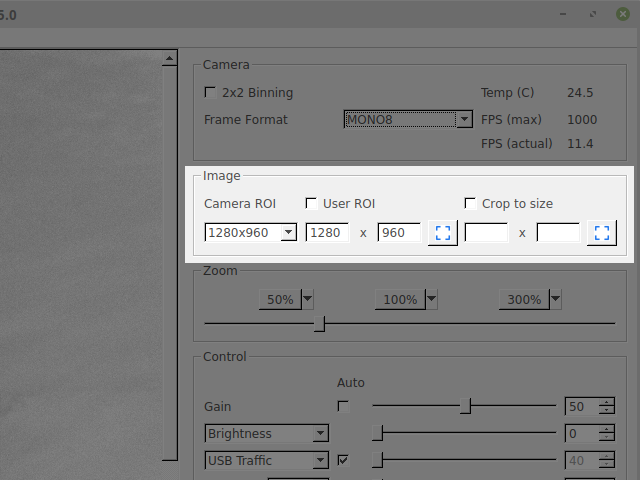
This set of controls allows the size of the captured image to be set. Where a range of resolutions is offered by a camera driver however, these appear in the drop-down beneath the “Camera ROI” option and can be selected that way:
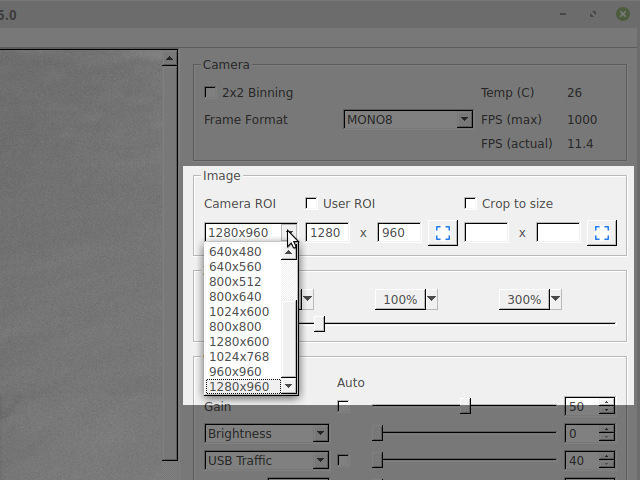
Not all cameras will support more than one choice here.
User ROI selection allows selection of arbitrary size regions if the camera supports it. To select an ROI enter the size required and click on the button next to it. oacapture may adjust the size if the camera enforces other constraints (eg. the ASI120 cameras require the ROI frame size to be a multiple of 1024 pixels).
Once a size has been selected the “User ROI” checkbox turns it on and off as required. Not all cameras will support this feature.
These two options change the amount of data transferred from the camera, potentially allowing a greater frame rate. The final option here is “Crop to size”. It works the same way as “User ROI”, but the cropping is done in the application. It can’t improve the frame rate because the larger frame still has to be transferred from the camera, but it can be used to avoid writing excessive amounts of unwanted data to the image files on disk.
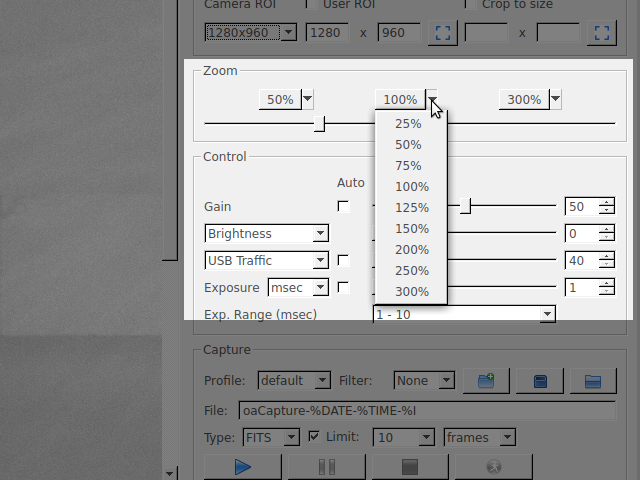
Preview Zoom Size
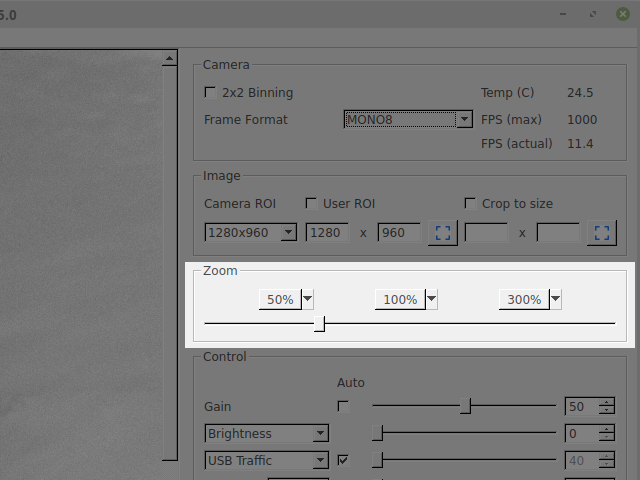
The Zoom panel allows the size of the preview image to be changed. This does not affect captured data written to a file, just the on-screen view. The three buttons allow direct selection of a fixed scaling of image whereas the slider beneath them allows arbitrary scaling from 25% to 300%. The actual values for the three buttons can be changed by selecting them from a menu by clicking on the arrow at the right of each button:
Camera Exposure Controls
The Control menu enables setting of gain, gamma, brightness, frames per second and exposure time where the camera driver offers those options. The values can be set by moving the sliders, by clicking on the up and down arrows in the boxes at the ends of the sliders or by directly typing values into the boxes.
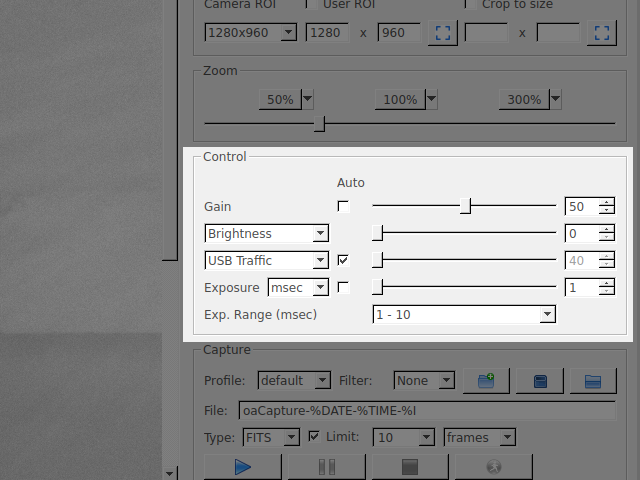
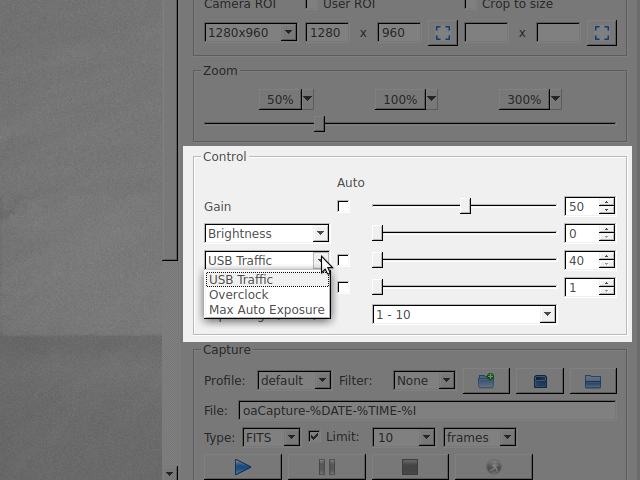
The gain, exposure time and frame rate sliders are always present if the camera supports those controls. The two other sliders are user-selectable from the entire range supported by the camera. Just pick the ones required from the drop-down whenever they’re needed:
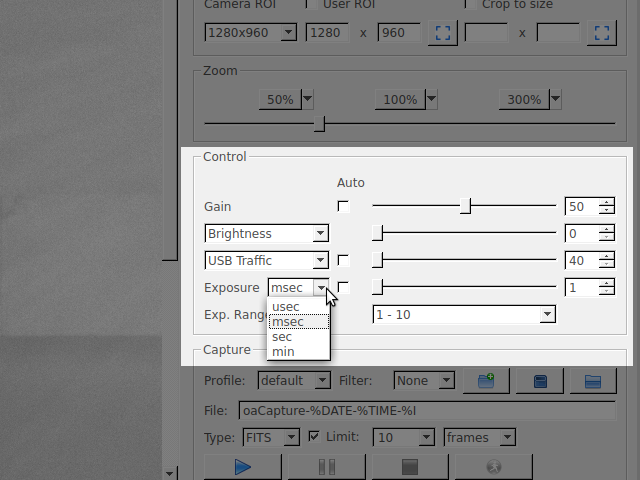
Some cameras allow a specific exposure time to be set which oacapture will show as (fractions of) seconds. Others use an arbitrary scale. The fractions used for exposure times can be selected here:
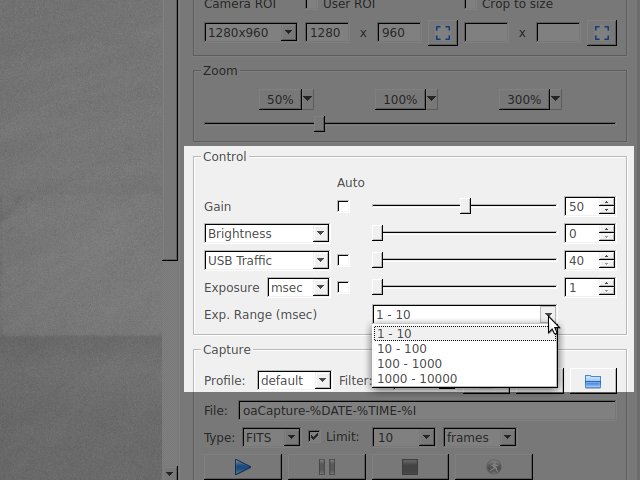
Where the range of exposure times is large, a drop-down menu is shown with varying ranges available for the current range of the exposure time slider:
Capture Controls
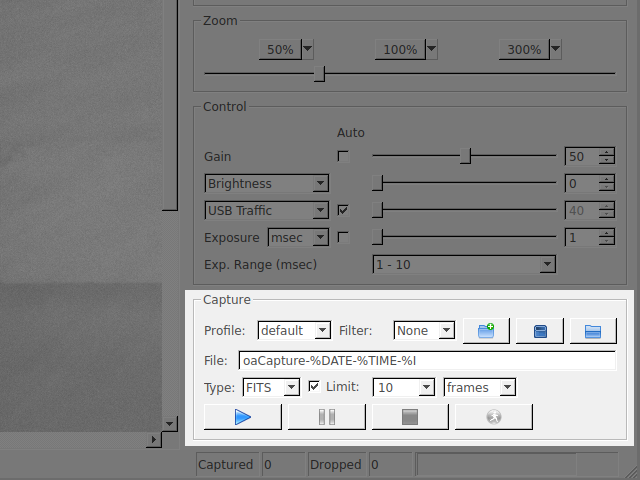
This pane controls functions relating to the capture process.
The “Profile” menu allows selection of preset values for the camera settings from those previously configured in the settings configuration. The button to the right of the menu restores the settings associated with the profile currently in use in the event that they have been changed.
The “Filter” menu selects the name of the filter in use. If no filter wheel is connected this allows the full range of filters to be chosen. When a wheel is connected, only those filters configured in filter slot positions are offered.
“Filename” sets a template for the names of the files saved by the capture process. Substitutions are made in this name from the following set:
| %D or %DATE | the date, in the form YYYYMMDD |
| %T or %TIME | the time of day, in the form HHMMSS |
| %U | both of the above: YYYYMMDD-HHMMSS |
| %P or %PROFILE | the profile name |
| %F or %FILTER | the filter name |
| %Y or %YEAR | the current year, YYYY |
| %M or %MONTH | the current month, MM |
| %d or %DAY | the day of the month, DD |
| %h or %HOUR | the current hour, HH |
| %m or %MINUTE | the current minute, MM |
| %s or %SECOND | the current second, SS |
| %E or %EPOCH | seconds since the epoch (1/1/1970 00:00:00) |
| %I or %INDEX | the number of frames captured since the application was started | %G or %GAIN | the current gain setting | %x or %EXPMS | the exposure time in milliseconds | %X or %EXPS | the exposure time in seconds |
The three buttons above the right hand end of the Filename box allow the current directory for saving captures to be changed, the last capture to be deleted and viewing of the contents of the capture directory.
The “type” menu selects the file type for saving data. Not all formats are available all the time. For example. TIFF is not available for raw capture for instance because it cannot store raw frames. When using formats that store each frame in separate files, to prevent the files all having the same name the “%INDEX” substitution can be used in the filename.
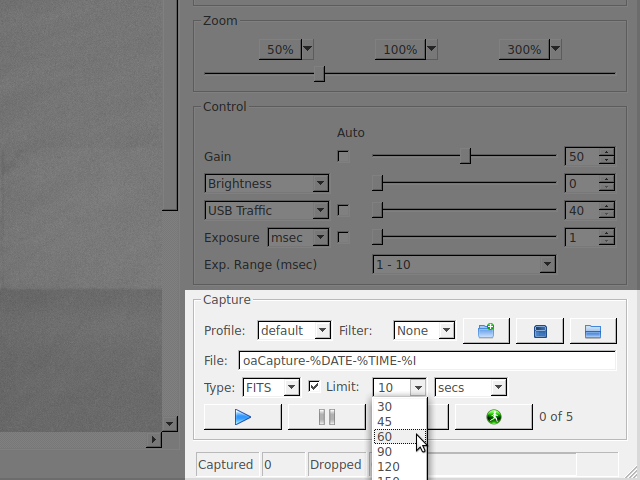
The Limit checkbox, when checked, allows setting a limit on the number of frames in or the length in seconds of each capture file. Checking the box opens up options for selecting the number and type. The limit box also has a drop-down for commonly-used values.
The first two of the final row of buttons start and stop the capture run. The final button is used when “autorun” is enabled:
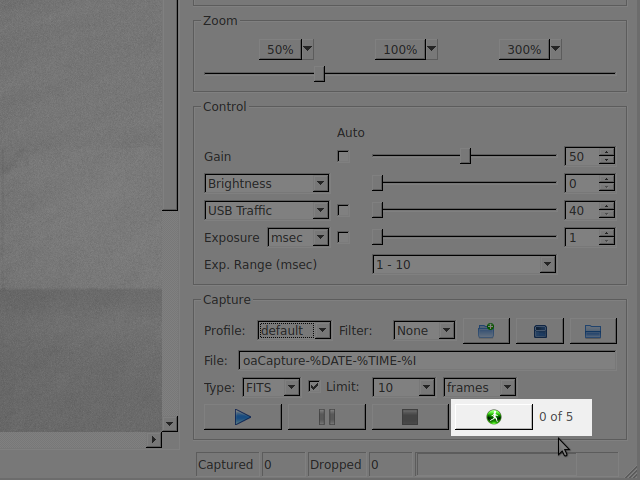
Once an autorun is complete (progress is displayed alongside this last button), clicking this button resets the autorun values to those chosen in the “Settings” window. This allows another autorun to be started without having to open the settings window again.
Status Bar
![]()
Finally, the status bar from left to right contains:
- An area for status messages
- Indicators that a filter wheel and/or timer device is connected
- GPS location data, where available
- A count of the number of frames captured (and dropped, where available) in this run, and following that
- A progress meter